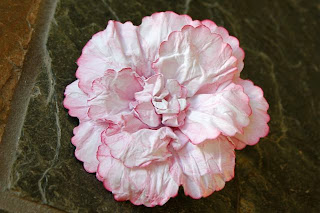
What you'll need to create this flower is:
-- white cardstock (the cheap stuff from Michael's is just fine!)
-- chalk ink color of choice (I used pink)
-- 6 scallop hearts using a punch or die (your choice of size - depending on the flower size you want to achieve). My punch is 2.5 inches = 3.5 inch flower on done!
-- 2 scallop circles using a punch or die (about half or 2/3 of the size of the heart size you use - mine is 1.5 inches). You could alternatively use a small flower punch.
-- water mister
-- brad (you will not see it so don't use a decorative one)
-- tweezers
-- paper piercer or anything to poke a small hole through 8 paper layers
STEP 1 - Ink your hearts and circles (or flowers) - you do not need to blend the ink.
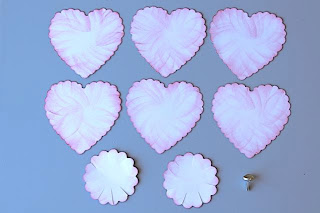
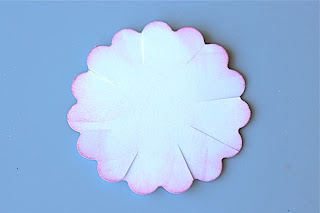
STEP 2 - Cut a slit a every second circle scallop "valley". You may end up with odd number as I have so for the last one cut in the middle of one of the "mountains". Skip this step if using a flower punch.
STEP 3 - Water mist all of the hearts and circles and stack 4 hearts like this:
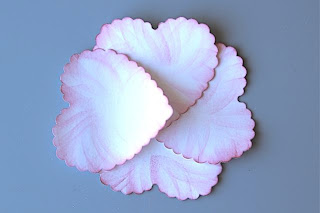
STEP 4 - Add 2 more hearts but place them a little closer to the middle than the first 4.
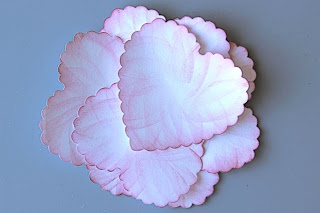
STEP 5 - Add your 2 circles to the pile and mist a little more
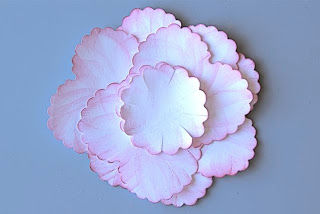
STEP 6 - Poke a hole with your paper piercer, secure the brad in the middle and start scrunching the circles toward the centre in to a tight paper wad - for nice creasing.
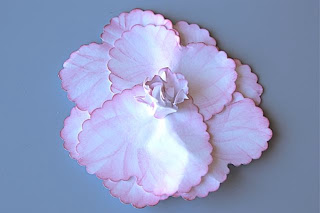
STEP 7 - Do the same with one heart at a time and give the entire thing a good tight squeeze. Let it sit like that for a few minutes. If your flower is very wet, you may need to let it sit for a while. You want the petals to be barely damp so that when you open it up, they curl back well instead of flatten out.
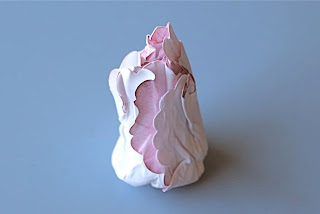
STEP 8 - Carefully pull back the hearts tips a bit and shape curved down like this:
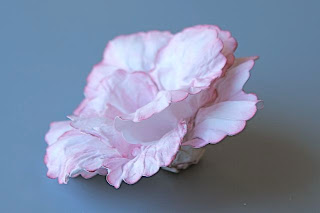
STEP 9 - Using your tweezers, twist/shape the centre as desired. Let it dry overnight or speed things up with a heat tool until completely hardened.

DONE! That's it. No complicated tool or techniques!
Here is a variation from a past project, using only the large hearts with patterned paper and a bunch of berries instead of the circles. This worked better for a Fall layout about my boys.


LOVE this! Thank you for such a fabulous tutorial! Wonderfully written - very easy to understand.
ReplyDeleteGorgeous flower!! TFS!!!!
ReplyDeleteBeautiful flower. Thanks for the tutorial, I will be making these.
ReplyDeleteThanks for the wonderful tutorial for these beautiful flowers. I have posted a link over at the Creating Keepsakes scrapbooking forum so others can see this.
ReplyDeleteHow pretty! Can't even tell the petal shapes started as hearts.
ReplyDeleteWhat a great tutorial! I'm dying to try this!
ReplyDeleteLove it! Can't wait to try it!!
ReplyDeletefabulous!
ReplyDeleteQue linda Flor...Parabéns Obrigada pelo tutorial. abraços.
ReplyDeleteWhat a beautiful flower ... Congratulations Thanks for the tutorial. hugs.
You make the BEST flowers!
ReplyDeleteAbsolutely gorgeous! Thanks so much for sharing.
ReplyDelete