This month I'm going to share a few more advanced tips about shadowing. I really feel that good shadowing can make the difference between a good digital scrapbook page and a fabulous page. I also think it is a skill that takes patience and practice to learn. Let me admit to you that I am still learning and always practicing. It is one skill that I do not feel I will ever master. As the software evolves, we get more and easier tools available to helps us create more realistic shadows. So please, don't be afraid to try new things and practice, practice, practice!

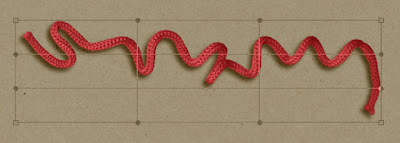
Sometimes the item that you are creating a shadow for is not flat. So you would like to create a shadow that is not "flat", but that flows or maybe you'd like it to "lift" the item off the page a bit. Strings are a great example of this. In the image above you can see a string with the basic drop shadow that we learned about last month. It looks fine. But we can make it even better!

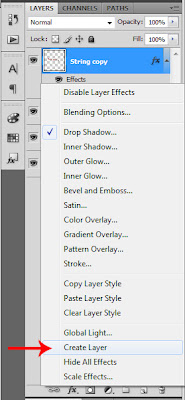
In Photoshop (the full version), you can move the shadow to it's own layer, giving you more control over how you manipulate it. To do so, In the layers panel for the particular layer, right click on the layer effects (make sure to click on the "fx" to open the effects for that layer if it is not already opened). A drop down menu will show. Click on "Create Layer". This will separate the shadow from the element, placing the shadow on it's own layer directly below the element's layer. You can also do this through the menu, simply select Layer> Layer Styles> Create Layer.

Now, being certain to make the shadow layer active, you can begin to edit it. Select the warp tool. Edit> Transform> Warp or by pressing ctrl+T and then select the warp icon (see the image below).
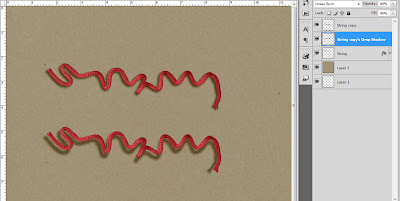
Since this also makes the string appear to be further away from the paper beneath it, I like to reduce the opacity of the shadow layer as well.

Above is a comparison of how the two different shadows look. You can see that the 2nd shadow has a bit more character.
Another way that you can edit the shadow is with the smudge tool. Once you have the shadow on it's own layer, select the smudge tool. Use a soft round brush set fairly larger than the area of the element you are adjusting. In my example it was set to 425 with strength set at 50. Use the smudge tool to pull the shadow slightly in the direction that you want.
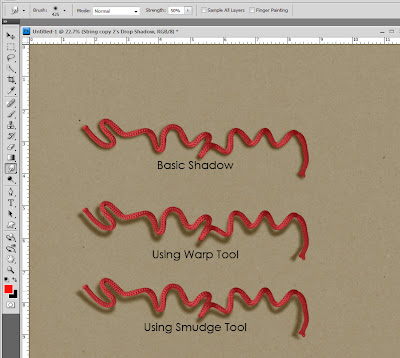
Below you can see the examples.

- The top most has the basic shadow
- The middle shadow was made using the warp tool
- The bottom shadow was made using the smudge tool
Have some fun using new tools and techniques to create shadows on your next project. As always, if you have any questions or suggestions for PS tips you'd like to see, please let me know.


No comments:
Post a Comment