Today, you can work along with me in Adobe Photoshop Elements. Download the template Circles and Curves here. I am going to be creating a shaped photo block for BOTH digital and hybrid scrappers.
Step 1: Open up the template. It should look like this image. You will see the photo and background layer at the bottom right-hand side.
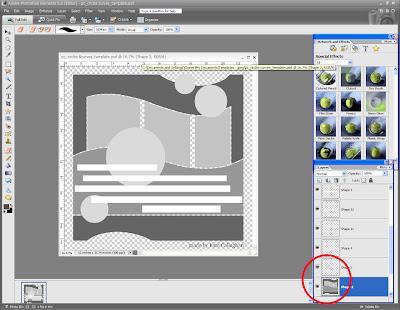
Step2: Take that layer and drag it the top of the palette like the photo below.
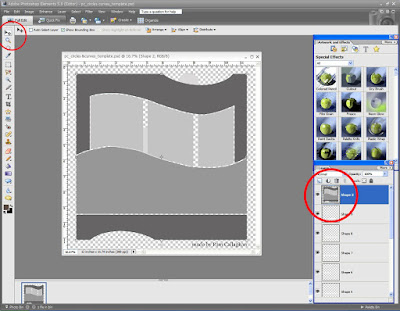
Step 3: Open up your desired photo and click on the Move Tool indicated in the photo below (in the top left corner). Click on the photo and drag it onto the original circles and curves file. See the screen shot below.
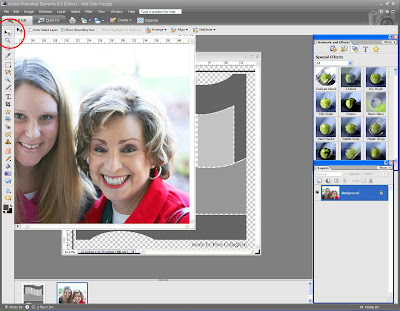
Step 4: To resize your image click on the Move Tool (on the left-hand tool bar). The photo will have a dotted line around it. Move the dotted line it in and out (at the CORNER) to get the right size for the first photo template spot. Make sure your photo layer is ABOVE your template layer.
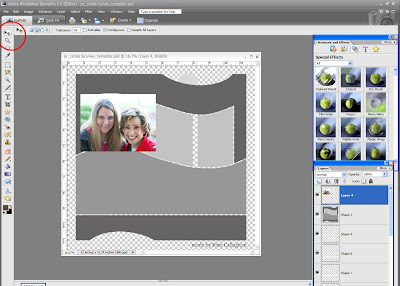
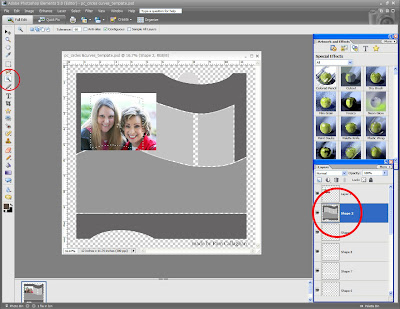
Step 5: On the layered palette, click back on the template layer (it must be THIS layer). Click on the Magic Wand Tool on the left-hand side and click the first photo spot. This will have marching ants around it like the image below.
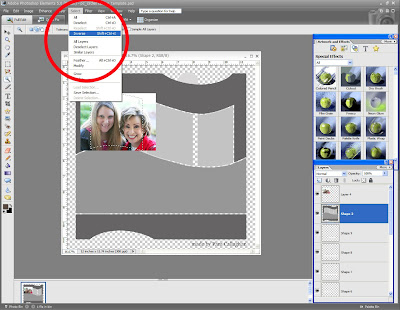
Step 5: Under the top bar, go to SELECT and then INVERSE. You can see the example below.
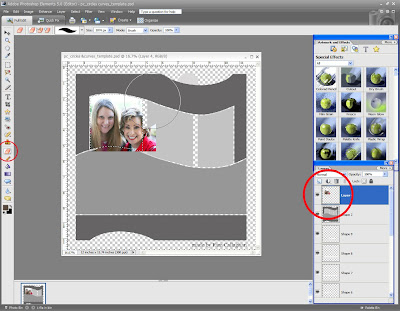
Step 6: You must click back onto your photo layer (this is very important). Go the Erase Tool on the left side bar and erase the outside of the photo. Your image should look like this. When you are done don't forget to click CONTROL-D to deselect the area. If you don't it get all messed up.
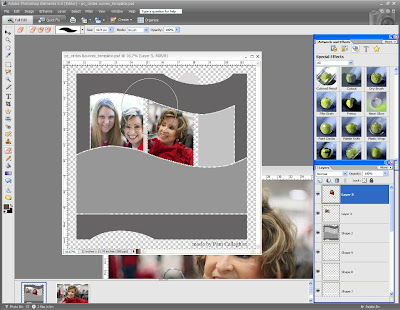
Continue the step for the next photo, follow the steps 1-6. Here is a screen shot of me working with that.
When you finish all three photos, the image should look like this:
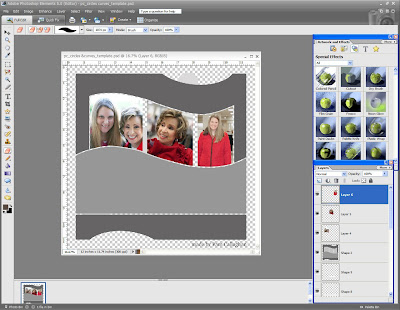
If you are digital scrapbook you are going to want to continue doing these step on the other sections. For the darker grey spots, you can use digital paper. These next steps are geared for hybrid scrappers in order to print their photo shape.
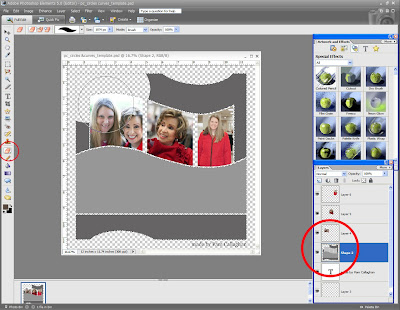
Go to the template layer and click on the Magic Want button. After you have click on each grey area, go the Erase Tool and erase the color. When you are done don't forget to click CONTROL-D to deselect the area. Your step should look like this screen shot.
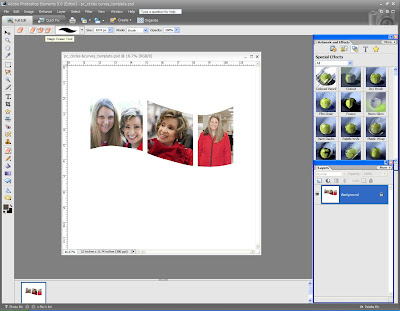
Next, delete the other layers below by right clicking on the desired layer and hitting delete layer. I went up the top bar under Layer, and hit flatten image. Your image should look like this.
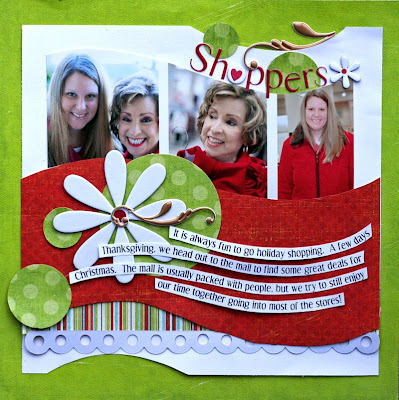
Go ahead and print that out in the desired size and scrapbook it! I did all of these steps and created this page! In this example I had already printed out the whole template to trace onto my patterned paper.

Very nice! Wish I was brave enough to try digital!
ReplyDeleteJust a quick note to let you know that a link to this post will be placed on CraftCrave.com in the Printables category today [07 Mar 01:00pm GMT]. Thanks, Maria
ReplyDeleteI LOVE this tutorial!! THanks Pam!
ReplyDeleteThank you for sharing another tutorial! Have you ever tried the ctrl+alt "blending" layers technique? That is a nice way to do it because you can move your photo around or re-size your template block. It's late here right now so maybe my brain isn't following correctly... Keep up the good work - I love to see how you get around so many obsticles that hinder us digi/hybrid folks!
ReplyDelete