Showing posts with label Smash Book. Show all posts

Thursday, September 6, 2012

Smash Book/Mini Album


Hi there, it's Cathy, and I've got another type of Smash style mini album to share with you today.  This one was made using a UniKeep binder. These are great for creating mini albums, photo books, and journals.  They help protect your photos and creations. They are sturdy and can stand up to traveling too. So they make great projects to take with you on vacation. They also make great storage for unmounted stamps! (See this post for them in use as stamp storage)


This particular UniKeep binder came with photo sleeve inserts. This will make it easy to create a mini album. You can insert photos and journal cards in the sleeves and presto, you've got a quick personalized album!

Here are a few more views:


My album is a hybrid project. I used a combination of digital kits, cardstock and traditional crafting supplies.  I cut several of the images using the Silhouette Cameo and paper pieced them. To create an insert long enough to wrap the cover front, back and spine, of the binder, print 2 papers with the background digital paper pattern and join them in the center with a strip of paper the width of the spine. Or use 2 8.5x11" traditional scrap papers and join with a strip of paper or ribbon at the spine.


For a complete list of supplies, you can see this post.


Thursday, July 5, 2012

Travel Journal Smash Style


It's summer time in many parts of the world, and that means vacation time. Hi, it's Cathy here today to share how I create journals for our travels. These little beauties really help me with my scrapping, and my memory!

Whenever we travel, I always take a notebook to keep track of my thoughts. I jot down things we did, places we visited and laughs that we shared. These notebooks come in handy when I finally get around to scrapping our trip (usually months or even years later!). I can read through them and be reminded of all those wonderful moments that I never wanted to forget. Some of them I only remember because I did write them down!  :-)

Lately, I've been making my little travel journals a bit fancier. Instead of the little lined notebook from the office supply shop, I've been making personalized journals for my trips.  It's fun to do ahead of time when you are excitedly anticipating your vacation.


This little book was really easy to make. I designed it in Photoshop using digital scrapbook elements.  I printed it on a piece of 8.5"x11" canvas textured paper in landscape orientation (Simply folded the cover in half lengthwise to create the album).  I painted on a few coats of Mod Podge Hard Coat decoupage medium. The nice part about the Hard Coat variety, is that it dries with no tackiness and, once it is cured (only takes a few days), you can actually wipe it with a damp cloth to clean it!

I used 3 hole punch graph paper (turned landscape) for the paper inside the journal. I would have preferred to not have the 3 hole punched type, but it was what I had on hand.  I like to use graph paper in my journals. Not only does it give me lines to write on (if I want to), but it also makes it easy for me to sketch things in perspective if the mood so moves me.


To create the "binding" for this journal, I simply punched 2 holes through the cover and inside papers, then tied some twine through the book. Doesn't get much easier than that!


For a little added "bling" I strung some beads where I tied up the twine.

This next travel journal is a bit more involved.  I created this one as a Smash type journal. I created the cover using digital scrapbook kits and elements. I printed the covers out and decoupaged them to chipboard. I also used the Mod Podge Hard Coat on this one, so I would have the nice finish that is easy to clean.


This book is larger, it measure 9" tall x 5.75" wide.  Inside I used a combination of graph paper, pocket pages and envelopes.  In the pockets, I've prepared some elements that I can use to title or accent my journal pages.

The pockets and envelopes can also be used to keep memorabilia and ephemera that we collect on our trip.

I don't put photos in my journals. For one thing, I don't have a way of printing my photos when I am away.  I also don't want to take time away from enjoying my family and vacation to be scrapping.  But I do make notes in my journal of  photos that I really like or I know I want to scrap later.  When we get home, I'll have everything right together in my journal to help me get to scrapping all my photos.

I'm really enjoying taking the time to create these more personal travel journals. It gives me just that little bit more incentive to make sure I journal about our travels.  And then, when we do get home, and reality returns, even if I don't get around to scrapping the photos for a while, I at least have a handy, and attractive, journal to read and reflect on our trips.


Friday, March 9, 2012

Handmade Smash Book


Smash books are all the rage right now.  Just what is a "Smash book"??  Basically it is a way to capture memories and life moments. The idea goes back to the roots of scrapbooking when people made simple memory books. They stuffed them full of memorabilia, photos and mementos.  Then scrapbooking took on it's own art form.  The Smash book idea is to go back to that quick and easier way of capturing what is going on in your life.  You can quickly add journaling and photos, stuff in special treasures and there you have it, life captured and "smashed" into your book!

K & Company has a line of Smash books and coordinating products that are irresistible! Or...........  you can make your own smash book! The smash book I'm sharing with you today was made using digital scrapbook kits and office supplies.  You can make your Smash book as simple or as involved as you like.  It's all up to you.

At my local office supply store, I found a bunch of stuff that would work great in a Smash book.  Envelopes of any kind are great. You can save things like ticket stubs in them, or use them to hold supplies to make smashing easier, like paper clips or pens.  Those notebook dividers that you had to buy for your child's school supplies, make great pages and pockets in a smash book.  

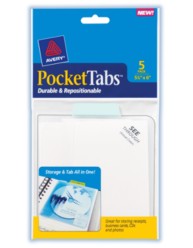
Avery has some really neat clear or colorful PocketTabs that make a great addition to a page. They can hold CD's, journal tags, or more items you want to save.  They are self adhesive, so they are easy to add to your pages, and they have a built in tab which can help you organize your book. They come in different sizes too!


Let me walk you through my book so you can see how simple it is to create a Smash book for your self. For my cover, I used blank chipboard. I adhered some papers and elements to the chipboard using Mod Podge. The ones I used happen to be from a digital kit, but you can use any papers that you like.  As I was applying coats of the Mod Podge, I added some glitter to the title strip of paper across the front.  I also bought the K & Company rubber band and pen from the Smash book collection. The pen is cool. It is a pen on one end and a glue stick on the other. This really helps make adding things to your book easy. I used my Crop-o-dile to punch holes and bound the book with book rings. This will allow me to add pages to my book if I want.


Pages 1 and 2, I've got plenty of room for journaling and photos. See that funky tape holding my journal tag on? That's also from the K & Company Smash book line.  So easy to just tape things down, and they have several tapes that are so decorative. You could use Washi-tape too!


Page 3 and 4, In between these pages, I inserted a pocket divider.  I covered it with coordinating paper to make it look pretty.


Page 3 and 4 (again) - just to show you that I covered the back of the pocket divider as well.


Page 5 and 6, I did a bit more decorating on these pages. I used digi kits that are all about journaling, Illuminated Journal 2 and Illuminated Journal 3 both by ViVa Artistry. These kits are perfect for this type of project. Since my Smash book will be a journal of sorts, I thought it was neat to create pages that look like a journal inside a journal! You can make your pages super decorated, or very simple, whatever fits your fancy!


Page 7 and 8, more pages that express a bit about me. Hopefully they will encourage me to actually write and express myself in this book!  After all, it's not just about creating the book, it's about making it useful!


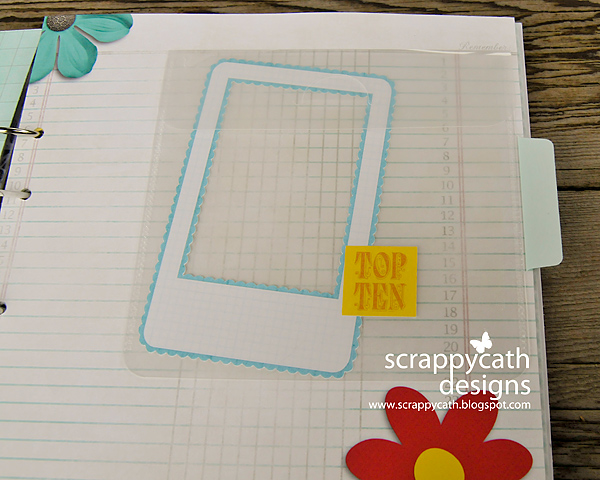
Page 9 and 10.  Here you can see one of those PocketTabs at work.  Here is a closer look

I've tucked in a frame and journaling element that I plan to use. Then I can use the pocket to hold special keepsakes!


Page 11 and 12, more tape! There is also another pocket divider. Right now it's holding some elements that I'll add to these pages when I start recording stuff.


Page 13 and 14, here I've included a decorated clasp envelope ( you can see the front and back) between the pages.  This will be great for holding some special items secure. You could decorate some of those return mail envelopes that come in all that junk mail. What a great way to recycle!

My book is a work in progress. That's why I like using the book rings for the binding. I'll be adding pages to this book. As it grows, I can change the rings to larger ones if I need to.

You can make Smash books for themes, time periods, moods, any reason you like. Maybe create one for a friend to record her memories while she is pregnant, or one for the time while planning a wedding. Maybe create one to capture all the fun you'll have on a special trip.  What ever you choose, just remember to have fun with it, and make it yours!