Showing posts with label Mini Album. Show all posts

Thursday, September 13, 2012

Paris Mini Album

Hi, Gael here today and I’d like to share with you a mini book I created using photos from our time in Paris last year.  I find when we come back from holidays we have 100’s of photos and I find it really daunting knowing where to start and how I can capture the memories and moments we enjoyed before they start to fade and other events take over.  This time I decided I was going to do a mini book on the places we visited.  I also decided to include not only photos of the wonderful places we visited but also photos that aren’t perfect but hold special memories for us. 

I created the album using things in my stash.  The album cover is core board cut to size and then painted and decorated.  The inside pages are mostly the same size but there is a section  where the pages are smaller to add a little more interest to the album.  I specifically decided not to add flowers or too much bulk to the inside pages of the album.
The inside cover (“memories of paris” page) is an envelope to hold some of the tickets and other bits I always collect when we’re traveling.  I did break my rule here and add a flower (it was just too hard for this flower addict not to have just one in the album!!).
Here is how it turned out –


Here is a bit of a look at the inside pages –


Thursday, September 6, 2012

Smash Book/Mini Album


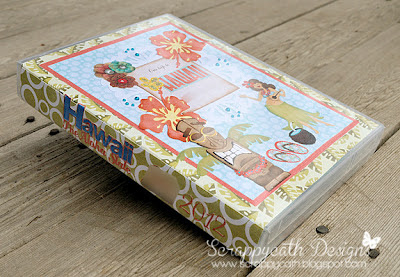
Hi there, it's Cathy, and I've got another type of Smash style mini album to share with you today.  This one was made using a UniKeep binder. These are great for creating mini albums, photo books, and journals.  They help protect your photos and creations. They are sturdy and can stand up to traveling too. So they make great projects to take with you on vacation. They also make great storage for unmounted stamps! (See this post for them in use as stamp storage)


This particular UniKeep binder came with photo sleeve inserts. This will make it easy to create a mini album. You can insert photos and journal cards in the sleeves and presto, you've got a quick personalized album!

Here are a few more views:


My album is a hybrid project. I used a combination of digital kits, cardstock and traditional crafting supplies.  I cut several of the images using the Silhouette Cameo and paper pieced them. To create an insert long enough to wrap the cover front, back and spine, of the binder, print 2 papers with the background digital paper pattern and join them in the center with a strip of paper the width of the spine. Or use 2 8.5x11" traditional scrap papers and join with a strip of paper or ribbon at the spine.


For a complete list of supplies, you can see this post.


Thursday, August 9, 2012

Trading Cards Display

Got a child that is into sports?  Maybe more than one child, or more than one sport??  One of my sons is an athlete.  He has played football, soccer, football, baseball, football, basketball, and did I mention football?  LOL

Over the years he has gotten his photo taken for each team, season and sport.  The photo packages usually come with those adorable trading card versions.  After you give the extras out to all the relatives and friends, what do you do with the ones you've kept?

I created a mini to store them in and put on display.  I used digital kits, elements to create the design. I then printed them, cut them out and created a wrap to go inside a UniKeep "Mini Wallet Case Binder" (it's the little one in the set at the link).


The digital kits that I used are: "Grid Iron Grit" by Quirky Twerp, "Play the Game" by Chelle's Creations, "Snippettes: Sports Football, and Sports: Football" by Sahlin Studio.


I used my Silhouette Cameo to design the layout and then print and cut the various elements.

Here's a look at the inside. The trading cards fir in the insert pockets perfectly!

Now I've got all of his trading cards, all the way up to high school, in one place.


Thursday, July 5, 2012

Travel Journal Smash Style


It's summer time in many parts of the world, and that means vacation time. Hi, it's Cathy here today to share how I create journals for our travels. These little beauties really help me with my scrapping, and my memory!

Whenever we travel, I always take a notebook to keep track of my thoughts. I jot down things we did, places we visited and laughs that we shared. These notebooks come in handy when I finally get around to scrapping our trip (usually months or even years later!). I can read through them and be reminded of all those wonderful moments that I never wanted to forget. Some of them I only remember because I did write them down!  :-)

Lately, I've been making my little travel journals a bit fancier. Instead of the little lined notebook from the office supply shop, I've been making personalized journals for my trips.  It's fun to do ahead of time when you are excitedly anticipating your vacation.


This little book was really easy to make. I designed it in Photoshop using digital scrapbook elements.  I printed it on a piece of 8.5"x11" canvas textured paper in landscape orientation (Simply folded the cover in half lengthwise to create the album).  I painted on a few coats of Mod Podge Hard Coat decoupage medium. The nice part about the Hard Coat variety, is that it dries with no tackiness and, once it is cured (only takes a few days), you can actually wipe it with a damp cloth to clean it!

I used 3 hole punch graph paper (turned landscape) for the paper inside the journal. I would have preferred to not have the 3 hole punched type, but it was what I had on hand.  I like to use graph paper in my journals. Not only does it give me lines to write on (if I want to), but it also makes it easy for me to sketch things in perspective if the mood so moves me.


To create the "binding" for this journal, I simply punched 2 holes through the cover and inside papers, then tied some twine through the book. Doesn't get much easier than that!


For a little added "bling" I strung some beads where I tied up the twine.

This next travel journal is a bit more involved.  I created this one as a Smash type journal. I created the cover using digital scrapbook kits and elements. I printed the covers out and decoupaged them to chipboard. I also used the Mod Podge Hard Coat on this one, so I would have the nice finish that is easy to clean.


This book is larger, it measure 9" tall x 5.75" wide.  Inside I used a combination of graph paper, pocket pages and envelopes.  In the pockets, I've prepared some elements that I can use to title or accent my journal pages.

The pockets and envelopes can also be used to keep memorabilia and ephemera that we collect on our trip.

I don't put photos in my journals. For one thing, I don't have a way of printing my photos when I am away.  I also don't want to take time away from enjoying my family and vacation to be scrapping.  But I do make notes in my journal of  photos that I really like or I know I want to scrap later.  When we get home, I'll have everything right together in my journal to help me get to scrapping all my photos.

I'm really enjoying taking the time to create these more personal travel journals. It gives me just that little bit more incentive to make sure I journal about our travels.  And then, when we do get home, and reality returns, even if I don't get around to scrapping the photos for a while, I at least have a handy, and attractive, journal to read and reflect on our trips.


Friday, June 22, 2012

Creating a Layout with Mini Album

Hi it's Lesley here. Because of my son in-law being in the military and only a few months away from being posted from WA way across to VA, they had no choice but to sell off their Caravan which has held so many good times for them.  Because of this I thought I would grab a few of my favorite photos of my grandson on 2 of those camping trips they've had and put them into a mini book on a page.  This of course isn't intended to be put in an album because of the bulk, but rather, is being put into a shadow box frame.
On the page I have cut around Henry for effect on the title.  The front of the mini book is covered with Pan Pastels which have given the sunset affect, and then over that I used a Versamark sticky ink pad to be able to emboss the stamped image.  I used a fine detail black embossing powder.  Title and embellishment on the book cover have been raised with pop dots for effect as well.

The following pictures are from inside the book.  Firstly page 1 and 2.  Page 2 I have created a pocket to put the photo in and the orange paper behind it is also a pocket so another photo can be popped in there.  The page is actually a folder so inside it are the pictures 3 and 4 in the attached pictures enabling 4 pictures to be shown on this one small page.

The following pictures are inside pages 3 and 4, with page 3 having a pocket with a small piece of ribbon attached to pull out the picture which you can just see sitting inside the back pocket.  Pages 5 and 6 have only the one photo as I have reserved page 5 for journaling and the green paper which I have written on is also a pocket so more journaling can be placed in it.  Page 5 is also another folder so when opened out you can see 3 more photos on the 2 sides of the inside folder.
I hope you enjoy this, I know we always aim to have flat pages for practical reasons within our albums, but sometimes you need to make an off the page item, with my intention of this is to allow Henry access to it now as an interactive book.

Sunday, July 10, 2011

Vintage Mini Album

This was my FIRST attempt at making a mini album. It originally was supposed to be for sb.com National Scrapbooking Week Long Challenge. However, I didn’t get it done on time, because there were so many details that I wanted to put into this album about me. I have tell you it is NOT my idea…I was totally inspired and scraplifted many components of the album from TracyTreasures24 at http://www.youtube.com/watch?v=Y1ZKib0zrWQ …….I did tell her about it quite some time ago….and she wanted to see it, when it was done. I wish I could do an excellent video like she did….maybe on the next one…coming soon!

Here is the album’s front cover, side profile, and thickness:


Here is the first page: It’s me as a baby! With my name and birth date, there is also journaling in the small book.


Here is the next page: It’s me, my mother and father and grandmother…miss her so much!
They are original photos from 1969....The opposite page is a waterfall card….it has photos and journaling too!


The next page is my father and I…we were so close when I was a little girl. He was a key strength in life….miss him too!


The next page I made an envelope using my cricut…I added velcro for the closure and I card with all my children’s photos in it too. I made another mini book that has journaling and photo of my dh and I inside.


Here is it open for a sneak peek.


The last page, I haven’t put any photos in it yet….also need to add ribbon to the tags..
Otherwise it’s done!


Here is the view of the back.


Hope you were inspired like me!…. ?


Thursday, November 18, 2010

Its Clear To See, I Love Acrylic Albums!

I am a fan of mini albums in general but I love Acrylic Albums.  Here are some of the reasons I like them so much.

* They are tough and sturdy!
* They are perfect for capturing pictures from a single event or a theme.
*They look beautiful out on display (I like to put mine a shelf or propped up on a plate holder)
*You will use very little paper to complete the album!
*My favorite thing is using rub-ons on them! You can put a rub-on on and and the design shows though on both sides.  Keep in mind you can not use words as it will appear in reverse on the other side.

Here are 3 albums I have created.   The Family Album is from ScrapWorks and I used this 8 page (16 front/back) to create a keepsake of a photo shoot with my husband family.

 This was a FUN album to make. Its an acrylic tag album by ScrapWorks.  I had some great pictures of our trip to see a Pirate Battle and I wanted my son to be able to look at these when ever he wanted to so the acrylic album was perfect!   You can see on the photo below how the skull would show up on both sides of the page.  its also fun to add ribbon and things to the binder rings of these albums. I had left over gold coin ribbon from my sons Halloween costume, it was a perfect touch to the album!


 This album is a spin off of the 'December Daily' Album idea, I am using my "Daily Dose" album to keep tack of things that make me happy for 30 days! (If you would like to see more about this idea check out my blog)  I have created my own acrylic album out of acrylic cards! My cards were 4 1/2 x 4 1/2 and I cut each of them a part and punched holes for the binder rings.  I also added pages I made from card stock because I need more pages than I had cards and this worked out great!  I used paint on the back side my font cover to add some extra color to bring out my title.  I also added a rub-on bingo card to the front side of my cover. Acrylic albums are great for layering!


I hope I have you thinking what you can create with acrylic albums! Maybe a nice gift for someone or a personal keepsake to display in your home! Be creative!