Showing posts with label Organizational Ideas. Show all posts

Tuesday, September 3, 2013

Storing Washi Tape

Cindy here!  Are you into washi tape?  I absolutely love it.  My first six rolls of washi tape hung on one of the two pegboards in my scraproom (which you can see here).  It was really convenient... until my collection of washi tape grew.  Soon I had washi tape cluttering up my desktop, balanced on paper trays, and on the floor under the desk.  Totally unacceptable.  

I've seen dozens of different ways to store washi tape, including vertically on a paper towel holder, lined up in drawers, thrown into baskets, organized in pencil boxes, and even displayed on a window shutter.  I wanted my washi tape to be out in the open but off the flat surfaces.  I wanted a storage system that was flexible in size and easily accessible.  

I happened to have a length of dowel that was just long enough to hold all my washi tape rolls. I bought some 3M wall hooks and stuck them above my bulletin board.

 
I organized my washi tape by color and threaded it on the dowel.  I balanced the dowel on the hook and that's all there was to it!


Here's a closer look:

 
I absolutely love it!  The best part is that I can leave the tapes in place and tear off whatever I need.  As I collect more rolls, I can either replace the dowel with a longer one and move the sticky-back hangers outward or I can put a second washi tape hanger just like this one directly above it.

How do you store your washi tape?


Monday, July 29, 2013

An idea for storing ribbon~

Hi there---Sheila here today to show you an idea for storing ribbon.  I have WAAAAAYYY too much ribbon in my life.  It was usually in a jumbled mess and I would just forget I had it.

Meanwhile, about ten years ago, I was fortunate enough to stumble on a sewing kit in a thrift store.  It was quite old, so none of the thread was good.  I unwound it all and revealed gorgeous old wooden spools.  Now mind you, this was before Pinterest, so those spools, though I loved them, stayed in a box for years! 

One day, my unused spool collection and jumbled ribbon collection came together in a fabulous way---
 All I did was thread a small length of twine through a wooden spool.  You wind your ribbon around the spool, and tie the thread in a knot over the ribbon's end.  It keeps the ribbon down.

Here is how it looks from the side:

Now, you may be thinking to yourself, that's all well and good, but I don't have a spool collection.  If not, a straw works just as well.  Just cut it to length, and thread the twine through it, like I did below.

It is still super easy to pull the ribbon you need out from under the twine.
Here is the basket I keep out in my craft room. Some ribbon is wound around spools, some straws, and some clothespins.  I think it looks so pretty!

Thank for stopping by today to see how I store my ribbon!  I'd love to see how you store yours!
VISIT THE CONTRIBUTOR'S BLOGS/GALLERIES
Cathy Dippolito
Dolores Schaeffer
Cindy deRosier
Marlene Murphy
Lesley Walker
Gael Spence
Sarah Routledge
Sharon Fritchman
Tanya Ham
Sheila Burns
Pam Callaghan


Monday, July 22, 2013

How I store my clear stamps!

Hi there! 
Sheila here today----and I have to confess, I am an organization junkie.  I find it almost as fun to organize my crafting supplies as I do to use them.  It's true.  The only problem is, I organize and reorganize so often, sometimes I forget where I've put things...so when I find a system that sticks for a little while, I figure it might be a good one to share.  Today, I wanted to show you how I store my clear stamps.  I don't have a TON of clear stamps, so this works well for me.  And, I always have it handy on my desk, so I am more encouraged to use my stamps. 

First, grab a regular three ring binder.  I had one laying around...love it when I can use stuff I already have.  Cut the front cover completely off with your craft knife (I used my daughter's binder for demonstration purposes, but for this project, you want at least a two inch binder).
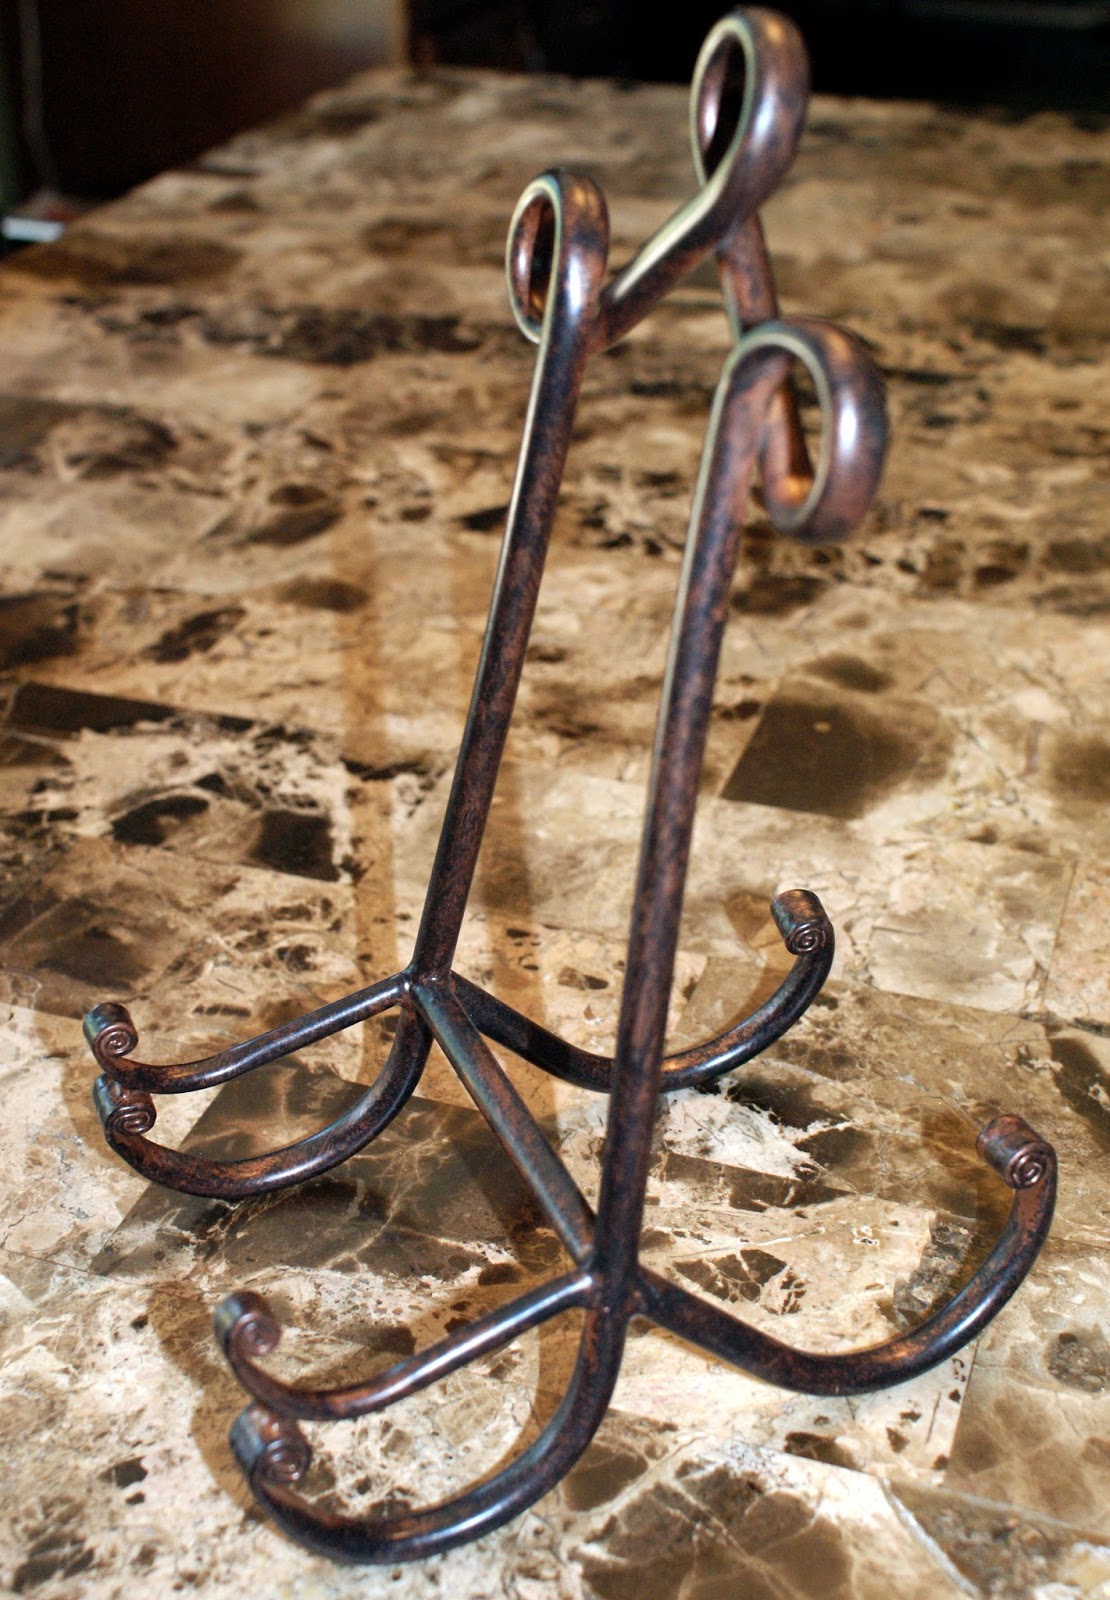
Then, find a plate holder/easel.  I purchased this from Michael's.  I think I paid $7 for it.

I don't really have pictures for this next part, but I think it is pretty easy to get.  You need some transparencies (available at Walmart or Office Depot---however, my school was throwing away a bunch because they no longer worked in the copier---I snagged two full boxes!)  Put the transparency on top of a piece of cardstock, whatever color you wish, and punch them together in a three hold punch.
Then, put your clear stamps on the transparency.  They stick perfectly.  The cardstock is so that you can attach the insert that came with the stamps that shows the images.

 Here is how mine looks:


I am able to put the manufacturer of the stamp right with it for my own reference.
Here's a shot below of some stamps that I didn't have an insert for---so I just stamped the images myself on the cardstock! 

It seems to work fine flipping pages over too---here is how it looks from the side.
Just make sure the bottom of your plate holder is wide enough to hold the thickness of your binder.

Hope you liked this cheap and easy idea...I'd love to know how you organize your stuff---I'll be back next Monday with another organization idea :)
VISIT THE CONTRIBUTOR'S BLOGS/GALLERIES
Cathy Dippolito
Dolores Schaeffer
Cindy deRosier
Marlene Murphy
Lesley Walker
Gael Spence
Sarah Routledge
Sharon Fritchman
Tanya Ham
Sheila Burns
Pam Callaghan


Tuesday, February 26, 2013

Where Do Lost Socks Go?

If you're looking for our 1,000 Post Party and Give-away, you can scroll down one post or click here.  Don't miss out on all the fun!!


In my house, we have this increasing set of socks that have lost their mates.  They have taken up real estate on my dresser. I wanted to find a more appropriate place for them to hang out while they wait for their match. So I created this missing sock board/sign to hang in my laundry room.


This started out as a plain unfinished wooden plaque.  I found some scrapbook paper that I really like. I'd say that it goes with my laundry room decor, but my laundry "room" isn't so much a room as it is the stairway landing to the basement! Not much "decor" going on there!  The paper is My Mind's Eye: Lost & Found Two - Sunshine: Memories "Sweet".  I also got some acrylic paint to match. I painted the board with 2 coats of the paint to be certain it was covered.

I then cut the paper to fit and rounded the corners. I inked the paper edges with Ranger Distress Ink Vintage Photo.  I also inked the edges of the wood to give it a more distressed and "old west" look. After all, it is a "wanted" sign!  I decoupaged the paper to the wood using some Mod Podge.


I cut the "WANTED" from brown vinyl using my Silhouette Cameo and adhered it to the sign.  I then gave everything a light coat of Mod Podge (hoping that helps to keep it in tip top shape for years to come!).

The clothes pins got a bit of the distress ink on the edges too. They are hot glued in place.  Now they hold the unmatched socks in need of a mate. Even the ones that are a bit worn and stained!  Talk about airing my dirty laundry! :)


Monday, September 10, 2012

Punch Organization

Hi, my name is Marlene and I am a border punch addict.  I do use them a lot and have found the discipline not to buy anymore, at least for now.  One of the problems I have had is knowing which ones I own.  On three different occasions I have duplicated purchases.  I set them aside for gifts for some of my scrapbook pals so the extras aren't taking up space, but still it was annoying. 
To solve the problem, I cut 2 x 3 inch rectangles of scrap paper.  I took each border punch and made one cut on the end of the cardstock.  That left a tab on either side of the punch which keeps the pages from becoming tangled.  The punch manufacturer was noted on the corner of each sheet, I don't save the packaging so have no idea of names.  A 1/2 inch circle was punched in the top left, taking care to line up the punch for a uniform location.  I bought a 2" ring at an office supply store then inserted it through the upper left holes to hold all of the samples together.
Now, I have an easily transported list of all the punches I have.  The sample is also handy to measure the depth of the punch.  When returning the punches to their respective storage places, I was able to sort them by like types so I not only know what punches I have, but where they are.
I apologize in advance for the poor quality photos.


Thursday, September 6, 2012

Smash Book/Mini Album


Hi there, it's Cathy, and I've got another type of Smash style mini album to share with you today.  This one was made using a UniKeep binder. These are great for creating mini albums, photo books, and journals.  They help protect your photos and creations. They are sturdy and can stand up to traveling too. So they make great projects to take with you on vacation. They also make great storage for unmounted stamps! (See this post for them in use as stamp storage)


This particular UniKeep binder came with photo sleeve inserts. This will make it easy to create a mini album. You can insert photos and journal cards in the sleeves and presto, you've got a quick personalized album!

Here are a few more views:


My album is a hybrid project. I used a combination of digital kits, cardstock and traditional crafting supplies.  I cut several of the images using the Silhouette Cameo and paper pieced them. To create an insert long enough to wrap the cover front, back and spine, of the binder, print 2 papers with the background digital paper pattern and join them in the center with a strip of paper the width of the spine. Or use 2 8.5x11" traditional scrap papers and join with a strip of paper or ribbon at the spine.


For a complete list of supplies, you can see this post.


Thursday, August 9, 2012

Trading Cards Display

Got a child that is into sports?  Maybe more than one child, or more than one sport??  One of my sons is an athlete.  He has played football, soccer, football, baseball, football, basketball, and did I mention football?  LOL

Over the years he has gotten his photo taken for each team, season and sport.  The photo packages usually come with those adorable trading card versions.  After you give the extras out to all the relatives and friends, what do you do with the ones you've kept?

I created a mini to store them in and put on display.  I used digital kits, elements to create the design. I then printed them, cut them out and created a wrap to go inside a UniKeep "Mini Wallet Case Binder" (it's the little one in the set at the link).


The digital kits that I used are: "Grid Iron Grit" by Quirky Twerp, "Play the Game" by Chelle's Creations, "Snippettes: Sports Football, and Sports: Football" by Sahlin Studio.


I used my Silhouette Cameo to design the layout and then print and cut the various elements.

Here's a look at the inside. The trading cards fir in the insert pockets perfectly!

Now I've got all of his trading cards, all the way up to high school, in one place.


Thursday, July 5, 2012

Travel Journal Smash Style


It's summer time in many parts of the world, and that means vacation time. Hi, it's Cathy here today to share how I create journals for our travels. These little beauties really help me with my scrapping, and my memory!

Whenever we travel, I always take a notebook to keep track of my thoughts. I jot down things we did, places we visited and laughs that we shared. These notebooks come in handy when I finally get around to scrapping our trip (usually months or even years later!). I can read through them and be reminded of all those wonderful moments that I never wanted to forget. Some of them I only remember because I did write them down!  :-)

Lately, I've been making my little travel journals a bit fancier. Instead of the little lined notebook from the office supply shop, I've been making personalized journals for my trips.  It's fun to do ahead of time when you are excitedly anticipating your vacation.


This little book was really easy to make. I designed it in Photoshop using digital scrapbook elements.  I printed it on a piece of 8.5"x11" canvas textured paper in landscape orientation (Simply folded the cover in half lengthwise to create the album).  I painted on a few coats of Mod Podge Hard Coat decoupage medium. The nice part about the Hard Coat variety, is that it dries with no tackiness and, once it is cured (only takes a few days), you can actually wipe it with a damp cloth to clean it!

I used 3 hole punch graph paper (turned landscape) for the paper inside the journal. I would have preferred to not have the 3 hole punched type, but it was what I had on hand.  I like to use graph paper in my journals. Not only does it give me lines to write on (if I want to), but it also makes it easy for me to sketch things in perspective if the mood so moves me.


To create the "binding" for this journal, I simply punched 2 holes through the cover and inside papers, then tied some twine through the book. Doesn't get much easier than that!


For a little added "bling" I strung some beads where I tied up the twine.

This next travel journal is a bit more involved.  I created this one as a Smash type journal. I created the cover using digital scrapbook kits and elements. I printed the covers out and decoupaged them to chipboard. I also used the Mod Podge Hard Coat on this one, so I would have the nice finish that is easy to clean.


This book is larger, it measure 9" tall x 5.75" wide.  Inside I used a combination of graph paper, pocket pages and envelopes.  In the pockets, I've prepared some elements that I can use to title or accent my journal pages.

The pockets and envelopes can also be used to keep memorabilia and ephemera that we collect on our trip.

I don't put photos in my journals. For one thing, I don't have a way of printing my photos when I am away.  I also don't want to take time away from enjoying my family and vacation to be scrapping.  But I do make notes in my journal of  photos that I really like or I know I want to scrap later.  When we get home, I'll have everything right together in my journal to help me get to scrapping all my photos.

I'm really enjoying taking the time to create these more personal travel journals. It gives me just that little bit more incentive to make sure I journal about our travels.  And then, when we do get home, and reality returns, even if I don't get around to scrapping the photos for a while, I at least have a handy, and attractive, journal to read and reflect on our trips.


Monday, April 23, 2012

Getting Organized

Hi everyone, Nancy here today to share with you a bit how I have been organizing my supplies.  A few weeks ago I decided to get organized with my Distress Inks, stains and paints.  I bought a new case and lots of foam applicators.
When moving all my Distress Inks into the case, I realized that I don't even really know what half the colors are (other than the obvious...blue, brown, pink).  So, I decided to make myself a little swatch book.
I stamped with each color, inked one edge with a foam applicator and the bottom edge straight from the ink pad.  This allowed me to see the different intensities available with each color.  Then, if I had the crackle paint or stain I added a bit of that to the top.  A few colors I even had the Distress Stickles for so I added those as well.  Now I know exactly what colors I have and what they look like (and what colors I still need...hee hee).  I am really hoping this helps me not buy any more duplicates and reminds me to use all the colors I have.

I hope this helps you get more organized.  I think my mists are next.

Hugs.

Nancy


Monday, March 19, 2012

Punch Organizers

Over the years, I have collected quite a few punches.  Not so many that I forget what I have, but it's getting close.  I decided it was time to create an organizer.

I started by dividing all my punches into two piles: border punches in one pile and everything else in the other.  I got out a scrap of black cardstock and punched a sample from every border punch.  I used white cardstock to create a card for each punch, then attached each sample to one and wrote the name above it.  I used my Crop-a-dile to punch a hole in the corner of each card.  


I wanted to be able to quickly find each punch, so color-coding was the next step.  I got out my cardstock scraps and punched circles to match each border punch.  Here's what the back the cards look like:


I added a ring, then tied an orange ribbon to the ring, indicating that every punch on the ring is Fiskars brand.  If I happened to own any other brand of border punches (which I don't), I would have made a separate ring for each brand and added an appropriate ribbon.

 
I did the same thing for my miscellaneous punches.  I have two rings of those, one for my Fiskars punches (in the picture below), another for the rest (mostly Marvy Uchida).  

 
I love my new organizers!  It's great to have a visual reminder of what I own, plus I love having the names of the punches all in one place.