Then you can cut little squares out of the other side of the Velcro strip and apply the adhesive side to the side of your Stickles bottle as show below.
Saturday, July 31, 2010
Organizing Stickles
Then you can cut little squares out of the other side of the Velcro strip and apply the adhesive side to the side of your Stickles bottle as show below.
Friday, July 30, 2010
Using a Template + Technique by Jennifer!
Here's the template:
And my interpretation, a little bit of a vertically mirrored version of the template:
Ruffles are definitely "in" -- just look at the Summer CHA sneak peeks from Maya Road, Bo Bunny, and other manufacturers, all releasing ruffled ribbons. I achieved a similar look to ruffles by just using paper. I like to call this little technique the "waterfall ruffle" because it looks like falling water if you adhere the ruffle across the middle of the page.
All you need to create this look is a scrap of paper about 5" x 8.5" (or whatever length you want your ruffle to be), scissors, and a project to use it on.
I've cut my scrap into a curve on one edge so that my final ruffle will be along a curved edge, following the curvy edge of the template.
Snip into the edge of the paper, about 1" to 2" long cuts, all along the edge of the paper. The cuts should make sections of paper that are between 1/2" to 1.5" wide.
Curl the cut strips up. The gently roll the strips into little tubes.
After the strips have all been rolled up as desired, attach the ruffle to your layout. I like to use it under photos so that it peeks out a little. Here's my finished layout with the ruffle attached and some yellow fabric trim and aqua pearl trim tucked under the waterfall ruffle.
Thank you for reading my little post and to Ideas for Scrapbookers and Pammy for featuring my work today. :)
(CLICK HERE TO LEARN MORE ABOUT JENNIFER)
Introducing Our Featured Artist for July 30!
My name is Jennifer Priest and I live in Hesperia, CA with my hubby and 2 kids. I've been scrapbooking since 1998 when the birth of my first child prompted me to start keeping a record of her life. I started teaching papercrafting classes and designing samples in 2003 and have been involved in all things papercrafty ever since. Besides papercrafting, I love to volunteer and do philanthropic work in my local community, with Girl Scouts, and with Scrapbook Royalty. I garden, dabble in other crafts (like sewing), and love going to craft fairs and farmer's markets. And I have a weakness for all the reality shows on Bravo!
Remember to visit her blog to get lots of cool inspiration: http://hydrangeahippo.com/
and I will be posting her ideas in a bit!
Thursday, July 29, 2010
Product Review
I bought this as a kit from my local scrapbook store, but Bo Bunny sells them separately, so the individual items I will use are the chipboard album, the paper pack, and sticker sheet.
The album comes with an acrylic front, 6 double sided pages (12 pages total) and a small chipboard page that I will use as a title page. Each page of the album is cut with a different design/ shape. The paper pad comes with 24 pages. 12 of these pages are already pre-cut to fit the pages of the album, and 12 are 8 x 8 in size. This makes is SO EASY! No agonizing over the perfect paper choices, and no cutting to fit around the chipboard shape then trimming with an exacto knife. All you have to do is match the paper to the page and glue away.
In less than an hour I had the basic album complete, and ready to add photos and embellishments. I did not add photos yet as I want to use this album for my son's birthday party in two weeks, but I LOVE the look of the basic finished design.
I have made many mini albums that are completely custom, where I choose the paper and make all the embellishments, and I love that those albums are totally one of a kind. But I also love how quick and easy this album was. So if you are looking for another option for making mini albums, the Bo Bunny products are the way to go.
Let us know if you have a favorite product you love. We would love to hear from you.
Wednesday, July 28, 2010
Designer Showcase: Fussy Cutting
Up first is Heather! She created these two layouts using this technique. You can see that in the "Cute as a Button" Heather actually cut some buttons out of patterned paper. What a neat idea! On her second page, Heather cut out the large patterns and used them as embellishments!
Nancy also created some pages using fussy cutting! In this first gorgeous page, Nancy cut out some flourish flower designs. On her second page she cut out lots of flowers and butterflies. This really adds a great touch to her designs!
Sara created two beautiful pages to share as well! In this first fun page, you can see that she cut out the points of patterned paper. This really makes the photo stand out! In her second page, Sara cut out lots of things like trees and the house elements to make a beautiful page.
Lastly I am sharing a beautiful page by Dolores! You can see that she cut out lots of gorgeous flowers and layered them on her page! It really makes the page "pop" and goes so well with the title of her page.
I hope you are as inspired as I am to use this technique!
Tuesday, July 27, 2010
Fun Ideas for Lace Papers
I have used lace paper as a background before, but sometimes my end product really covers up a lot of the beautiful lace design. So I decided I needed a page design that really allowed the beautiful lace to show! With my "Live Laugh Love" layout I made the lace paper a major part of the design and purposely didn't layer much of anything on top of it. Therefore the lace paper actually covers a majority of the space on the page.
Other times I have wanted to use lace paper as a layer in my layout and specifically wanted to cut the lace into a shape. Unfortunately detailed lace papers can have lots of loose pieces when you start cutting into them and in some cases you lose part of the lace design. The rose lace paper I used in my "Mr. & Mrs." page was typical of this issue. By the way, this picture is of me and my husband on our wedding day. Don't we look happy leaving the church!
To cut a simple circle out of my rose lace paper would have caused many of the swirl shapes to fall right out of the circle shape. It would have been a terrible puzzle trying to glue all these little pieces down and get them all in the right place. To solve this issue, before I did any cutting I decided to glue to the back of the lace paper a piece of acid free vellum. It is translucent so it doesn't show and it has plenty of body to hold all the pieces of the lace together. I used my Zig glue pen and just applied glue to the back of my lace where I thought my circle shape would intersect. Once I had the vellum glued down cutting a circle was easy. I just traced my circle on the back of the vellum paper and then cut the shape with my scissors. Every little piece of my lace stayed perfectly in place. So don't be afraid to cut those lace paper, this tip will keep all those little pieces right where you want them. Have fun!
Monday, July 26, 2010
5 Super Saver Ideas
1. Go online to your favorite store and sign up for their email list. Once you do this, they will email you their weekly specials and coupons that you can then print out as many as you want. AC Moore, Joann Fabrics, and Michaels all send out 40%-50% discount off one regular priced item typically once a week. The good news is they take competitor coupons. So if the AC Moore coupon is for 50%, I will use that one first at Joanns and Michaels, since their coupon is typically only 40%.
2. Look for scrapbook supplies in places that you might not normally think of. I have found some great deals on scrapbook supplies at Big Lots, Marshalls, Ross, and Tuesday Morning, all of which are not traditionally "crafty stores". Here are some of my great deals:
Jenni Bowlin paper pack with 36- 12x12 paper pages, 2 die cut paper pages, 1 sheet alpha monogram letters, 6 journaling cards, 2 bingo cards, 2 chipboard stars (2 sizes), and 1 tab sticker sheet all for $2.99 at Tuesday Morning.
K*1 memories paper pack with 18 sheets of 12x12 paper included two die cut pages, and 4 sheets of shimmer paper all for $2.99 at Tuesday Morning.
Martha Stewart punches for under $5 at Marshalls.
3. Look for discount photo printing options. I use my home printer often, but the cost per print ends up being very high as you are paying for the convenience. If I know I have lots of photos to print I use the Ritz special of 6 cents per print on Tuesdays and Wednesday only (I believe it is 15 cents per print on all other days). This is for the 3 x 5 print (not 4 x 6), but I actually like the size for layouts as it allows the use of more photos. You can also get them printed with a white mat and not have to mat yourself, if that is your preferred look.
4. Sometimes I find a product I really like online that my stores may not carry, but many times the shipping costs for just one or two smaller items can be outrageous. I have found that if I give my local scrapbook store the information on the item they will order it specially for me. The cost generally ends up being the same as online (or very close) but with no outrageous shipping, so the total cost ends up being less expensive.
5. Following with the ever popular dollar value menu.....retail stores have begun offering something similar. Michaels and Joanns now each have sections where all the items are just $1. I have found them to be hit or miss, and not all the item are necessarily scrapbook related, but I have founds some great finds included (should be including) bags of buttons, shaped chipboard albums, stamps, chipboard letter/words, and ribbon.
I am always looking for ways to save, so if you have any ways to save, please share. Would love to hear from you!
Sunday, July 25, 2010
Two Reader's Pages
Today I am sharing two fabulous reader's pages! The first page is by a scrapbooker named Cheri! She created this adorable page using my scallop circle page template. I love the way she combined brown and pink to create this fabulous page! She used the template so well on her layout!
I am also sharing a page by Libeeti! She sent me this adorable page after I posted designer showcase: layouts with 5 or more photos. I love the way she used tags on three of them, neat idea! You can visit Libeeti's blog here: http://creationswithlove-li-bee-ti.blogspot.com/ .
I hope you are inspired by by these reader's pages :)
Saturday, July 24, 2010
Reader's Pages Turned Into Sketches 4!
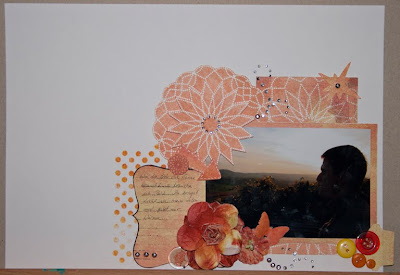
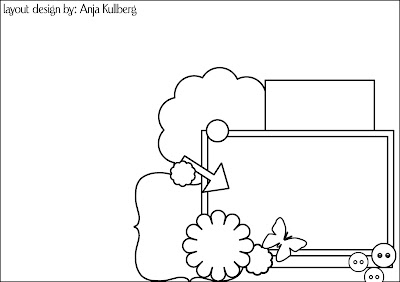
The first page I am sharing is from Anja! She sent this amazing page with so much detail on the right side and white space on the top and left side. I love how has so much detailing on her page! You can visit her blog here to get more inspiration: http://www.kleinteufelchen.bplaced.de/blog.php . Here is her page and the sketch I created.
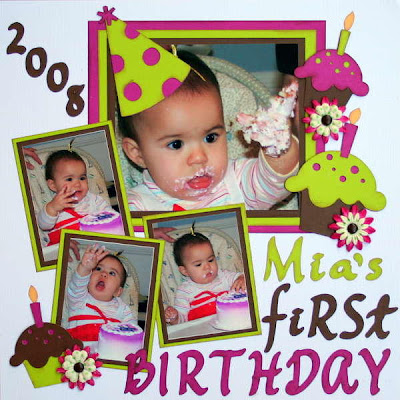
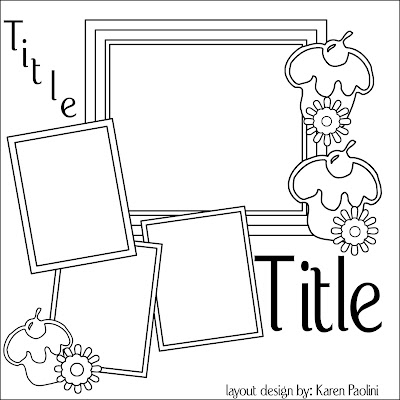
This next page was sent be Karen! She created this absolutely adorable page about a birthday party. Look at how fun and colorful her design is. She also did an amazing job angling the photos for a cool look. You can visit Karen's blog here for more of her work: http://aplacetosharemystuff.blogspot.com/ . Here is her layout and sketch.
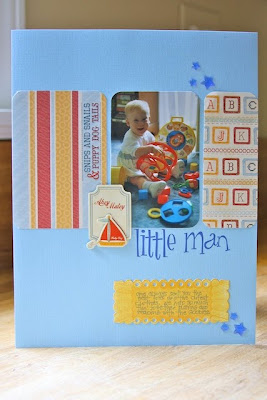
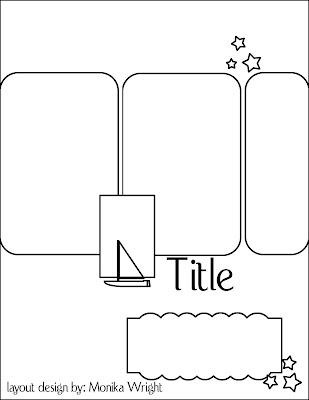
Lastly, I am sharing a page by Monika. She created an adorable 8.5" by 11" page using rounded corners and stars as accents. I love her little journal spot, it is perfect here. You can visit Monika's blog here to see more of her amazing work: http://www.iloveitallwithmonikawright.blogspot.com/ . Check out the page and sketch!
I hope you have enjoyed seeing these layouts and sketches. Thanks to Anja, Karen, and Monika for sending in your pages!
Friday, July 23, 2010
Misting Tutorial by Piradee
Thought I would share a quick and fun technique that I usually use when it comes to misting. For me I actually prefer the blotches that you get, rather than the even spread of the mist. And it has now slowly become a habit for me, that when I use white cardstock, I start with a light colored mist just to add a bit of tint to the cardstock. Here, I’m using Cream Metallic from Maya Road.
Then using the misting device itself, I start flicking the paint everywhere or at least in the areas that I wanted. This way I have all the colors that I need and also maintain the whiteness of the cardstock, which I prefer.
And here’s a sample of a layout that I did earlier, using the colors that best matched the pattern paper but still having somewhat of a “white” space look.
Thanks again for stopping by and hopefully I’ve inspired to you do something mist, if you’re not already addicted like me...lol.
(CLICK HERE TO LEARN MORE ABOUT PIRADEE)
Introducing Our Featured Artist for July 23!
Hi everyone, I'm Piradee Talvanna and am currently living in Singapore with my (super supportive) hubby for the last 2 years since we relocated here for work (I'm from Bangkok and he's from Brussels). I would say that I have always been a crafty person, always trying to find things to do or create, but really picked up on scrapbooking when I moved to Singapore in mid 2008 and fell in love with all the yummy goodies at my favorite LSS. I can still remember that day... I was a like a little kid in a candy store, going oooh and ahhh and guess what, I still am (at the moment drooling all over the new CHA goodies)! Also its the perfect outlet to let my creativity and letting my imagination run wild and especially helps me de-stress after a long day of work. I am also truly honored to be part of the design teams for American Crafts, Collage Press, Lily Bee and my LSS (in Singapore) Made With Love; its truly a dream for me to be able to play with all their amazing goodies and giving me an opportunity to share my inspirations.
Be sure to check out more of her work on her blog: http://www.piradee.blogspot.com/
I also sharing two beautiful pages by her! Be sure to check back for her inspiring post in a few minutes!