Showing posts with label Photography Tips. Show all posts

Friday, July 13, 2012

Photo Scavenger Hunt

Cindy here!  Our family just got back from a weeklong vacation to Bear Valley, CA.  My inlaws own a cabin there.  It's less than 5 minutes from beautiful Lake Alpine.


I am a huge fan of scavenger hunts.  Just about every time we travel, I make a scavenger hunt for the trip.  I've made scavenger hunts for Disneyland, for camping, and for numerous other occasions.  (Any excuse to use my scrapbook supplies!)  My 6 year old son had just finished a 3-week online Photography Summer Camp, so I thought it would be fun to do a photo scavenger hunt at Lake Alpine.  (Not to mention, it would be a great way to reinforce the skills he'd learned.)

I started by typing up a list of items I knew we'd be able to find at Alpine.  I kept the list fairly generic, but left room for interpretation and creativity.  I backed the list with patterned paper, added a sticker, and backed the whole thing with cardstock.  Here's how it looked:   

 
I wanted to be able to use these cards again for future trips, so I covered them with clear contact paper.  Then I added grommets and yarn.

 
When it was time for our scavenger hunt, I passed out the lists to the family.  I asked each person to photograph their list before we started.  Later, when it was time for judging, this would make it really easy to find the start of the scavenger hunt photos on the photo card. 


The family took some great pictures of spider webs,


moss,


and an unusual rock.


My husband took this picture of "something alive."  


My sister-in-law took this creative picture of her own shadow.


I loved watching how each person photographed the letters in their name.  My inlaws photographed license plates in the parking lot to spell their names.  Trevor used pinecones, rocks and sticks to spell his name along the trail.


My husband Steve took five different pictures and put them together into a collage.  Cool, huh?

 
With a few scrapbook supplies and well under an hour's work, I made a unique photo scavenger hunt that was fun for the whole family.  Not only that, but we can enjoy it again on future vacations.  I'd strongly recommend a scavenger hunt for your upcoming family vacations!


Monday, October 31, 2011

Digi Tip October: White Teeth

Happy Halloween!  Can you believe it is the end of October?  Time for trick-or-treaters!  And it's the last Monday of the Month so it's time for a Digi Tip. I've got a trick you can use in Photoshop/Elements that is a real treat!

A quick and easy way to whiten teeth in your photos.  You can do this in any version of Photoshop.
Open the photo that you want to brighten the smile on. Zoom in to the smile so you can see what you are doing.
Choose the "magic wand" selection tool. Be sure the "add to selection" option is chosen.  Click on the teeth to select them. You may need to click in a few spots on your teeth to get the majority of the area selected. It does not have to be perfect.  If you get too wide of an area, reduce the tolerance for the magic wand tool.

Now that you have the teeth selected, we are going to simply adjust the hue. In the full version of Photoshop click Image>Adjustment>Hue/Saturation.  In Elements choose Enhance>Adjust Color>Hue/Saturation.  In the dialog box that opens, next to the word "edit" open the drop down menu and select "yellows".  Slide the Saturation slider to the left. You may also have to slide the Lightness slider to the right a tiny bit.  Don't over whiten the teeth or they won't look natural.

There you have it. A quick and easy way for you to play dentist and apply a whitening treatment to teeth!  Now if it only were that simple on real teeth!


Friday, October 1, 2010

Taking Better Photos by Krisi!

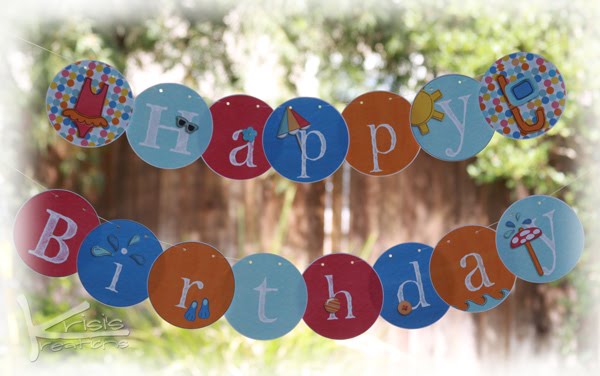
I'm Krisi of Krisi's Kreations and I am so excited to share a couple tips for taking better preview photos today.

1) Natural Light is your friend

Figure out when the sun is bright in a window (but not direct light) and try to take your pictures then.

Can’t use natural light? I know there are lots of days that the sun just doesn’t come out bright enough or it is midnight when I finish something and WANT to get the preview ready! What then? Turn on the lights – not flourescent though – and try to light the object from as many angles as you can.

This guy here has become my BFF - and I am not kidding.


I know it looks like a regular ol' light bulb but it is not. "He" is seriously the best investment - and it wasn't all that much. I got the lamp part at IKEA... about $6. The bulb was a two pack (I have one at my craft table and one where I take pictures) and it was about $13 for the two bulbs. They are daylight bulbs and truly make the room look like it is daylight. For bigger projects - taken at night - I have needed both the lights I have to have it light well enough on both sides to prevent harsh shadows. I often turn the light on even when I have some natural light but the area still is a little on the dark side.

Here are a few examples {Please note that all examples are STRAIGHT out of the camera}

Flourescent light on manual

Besides the fact that they are blurry you can see what a yellow tint it has.


Here is with the over head - flourescent light but with a flash on the camera - in auto mode


Daytime light on in manual {better but not perfect - but these are fairly easy to fix in Photoshop or Photoshop Elements}


In natural light {This looks most like the colors that I see on the card/project}


2) Use a solid colored 12x12 paper or larger under and behind the photo

This was taken in natural light but it has a distracting background - at least to me!

These are taken with white behind them. You can use other colors as well.


Here is what my area looks like that I take pictures. It usually ends up staying "up" most of the time but it does easily fold and can be tucked away for when I use that space as initially intended - for wrapping gifts!


3) Set a scene for your preview

I took this picnic set -- right out to the picnic table.


Another one that was taken outside... where the party was going to happen.


For this I set up the luminaria on my front table where it was suppose to be sitting.


4) Throw in some extras

Have some of what you are going to use the box for? Candies, soaps, etc. put them near the box when taking a photo.

Is it a card? Include the envelope under it (especially if you made the envelope or have hybridized that as well.

Some examples:


{I put out various other candies with the candy assortment. I used a sheet behind this one as well}


5) Angle your projects

I have used things from m&m's to wad's of paper to prop them just a little so they are not just flat on the paper.


Here is just used the chapstick lid - you can see above that it gives just enough angle to see the project better.


6) Spice up the angles/perspective or include detail shots


Here is the full backpack...

and from a different angle:


But here are some details of the flower.


The tutorial for this flower can be found on my blog.


I hope these tips have been helpful. I would love to hear what you felt was the best/most interesting tip!

Many of these projects are templates available in my store at ScrapMatters. The actual projects can be found with all their credits in my gallery at ScrapMatters.


(CLICK HERE TO LEARN MORE ABOUT KRISI)