Tuesday, March 20, 2012

A New Template with a Swirl Background!

I like free movement in some of my designs and swirl shapes always have a sense of freedome to me.  I decided to create a whole background that had movement with some swirl shapes.  Here is the layout I created called My Sunshine.

I placed the photo and embellishments in the largest swirl shape so that the lines of the swirls were mostly visible, with very few embellishments blocking those lines that give the page the feeling movement.  Then I let my journaling follow the main swirl shape so that it does not distract from the shape either.  When I created the layout  I liked these subtle papers because even with all that is going on with the shapes the focus remains on the photo.  The layout was created with a pretty mini kit called Your Are My Sunshine by Kim Broedelet. 

Here is the sketch of the template.

For our paper scrapbookers who may want to trace and cutout the shapes I have a image of just those basic swirl shapes.

For our digital scrapbookers I have a photoshop template that you can download at either of the two file sharing sites below.


Now how about giving a layout some new movement and life, try some swirl shapes!


Monday, March 19, 2012

Punch Organizers

Over the years, I have collected quite a few punches.  Not so many that I forget what I have, but it's getting close.  I decided it was time to create an organizer.

I started by dividing all my punches into two piles: border punches in one pile and everything else in the other.  I got out a scrap of black cardstock and punched a sample from every border punch.  I used white cardstock to create a card for each punch, then attached each sample to one and wrote the name above it.  I used my Crop-a-dile to punch a hole in the corner of each card.  


I wanted to be able to quickly find each punch, so color-coding was the next step.  I got out my cardstock scraps and punched circles to match each border punch.  Here's what the back the cards look like:


I added a ring, then tied an orange ribbon to the ring, indicating that every punch on the ring is Fiskars brand.  If I happened to own any other brand of border punches (which I don't), I would have made a separate ring for each brand and added an appropriate ribbon.

 
I did the same thing for my miscellaneous punches.  I have two rings of those, one for my Fiskars punches (in the picture below), another for the rest (mostly Marvy Uchida).  

 
I love my new organizers!  It's great to have a visual reminder of what I own, plus I love having the names of the punches all in one place.


Saturday, March 17, 2012

Shamrock Template!

Happy St. Patrick's Day Everyone!! It's Pam here with a special template to share created by Theresa Banks! She sent me this adorable shamrock template and I knew it was just perfect to share today.  She also gave some ideas on how to use the template with a adorable two page layout. First up let me share the digital layered template and preview.

Here is the preview of the template. You can always use this as a sketch if you like! There are so many cool ways to use this shamrock.


Here is a link to the digital layered template for Photoshop:


Here is the layout created by Theresa using a kit by Amanda Creations called Beary Lucky which you can download here. I love the way she incorporated this into a totally cute two page layout with a new baby theme. Check out how neat her design turned out.


Thank you so much Theresa for sharing your template with us!

Thursday, March 15, 2012

Gift Tags

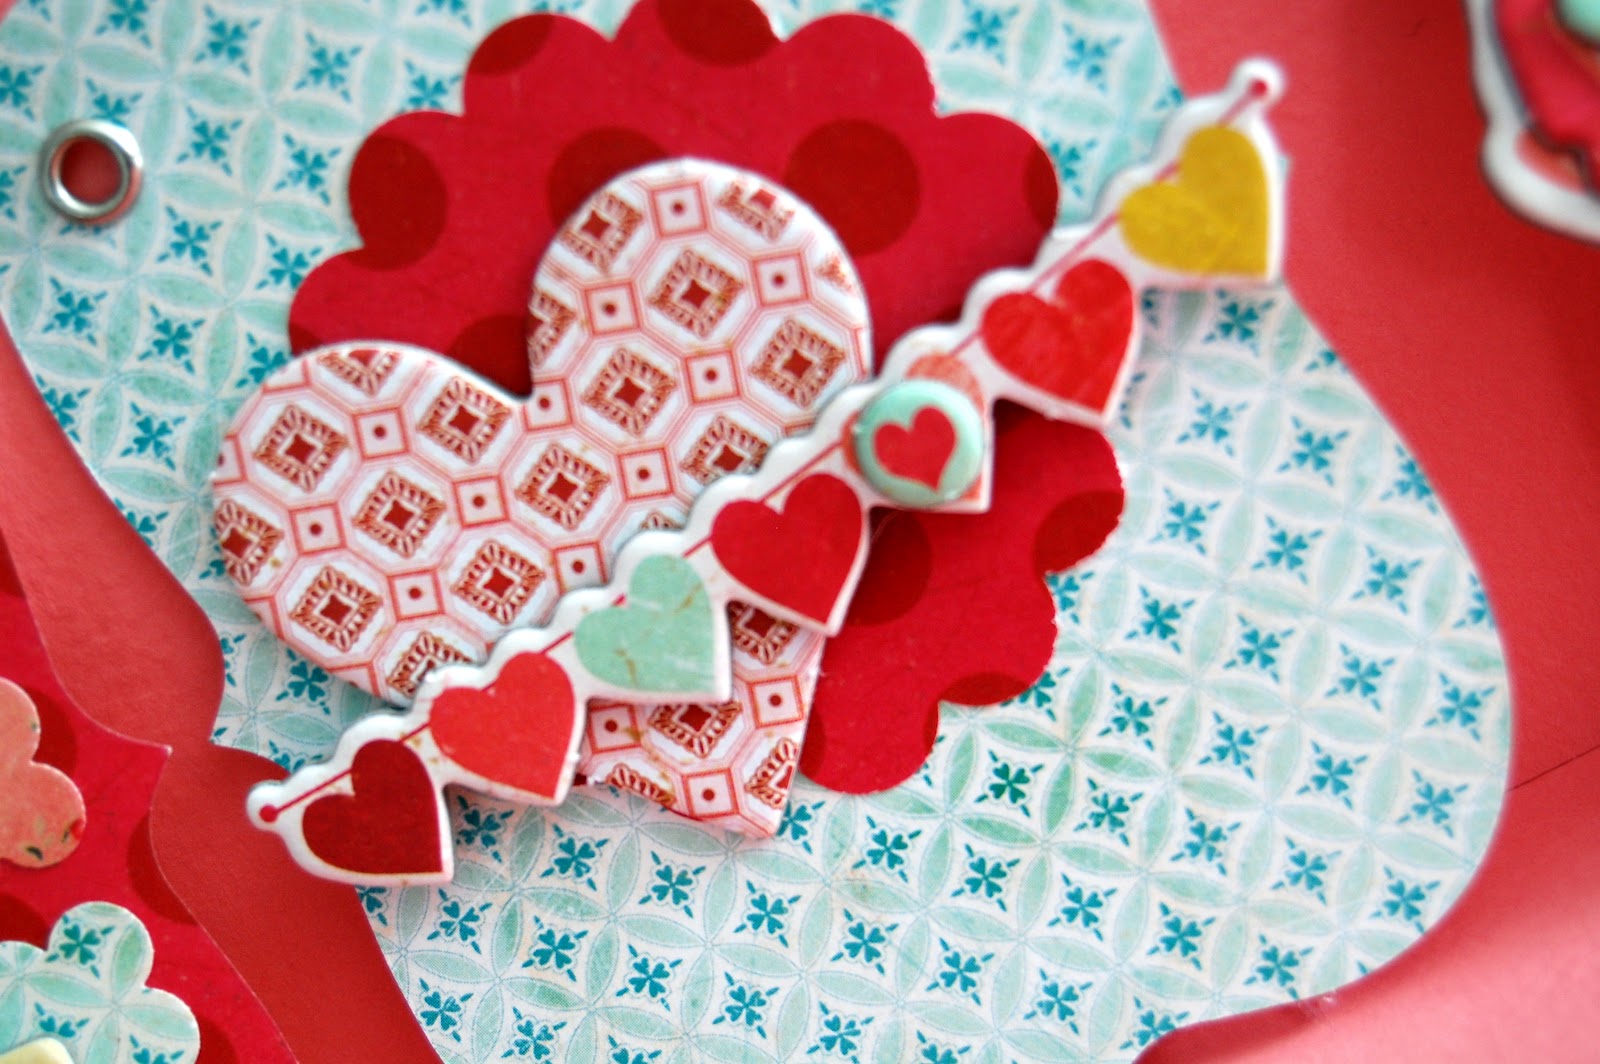
I love kits and collections of products and when I have gotten the most one used up I hate to toss the rest so I am coming up with different ideas to use up the whole kit. Today I wanted to share with you what I did with my left overs from the Be Mine Mini Kit at Scrapbook Circle. 

I started with some left over papers and embellishments from the kit.

I cut the each paper with the same die on my sizzx and put an eyelet in to create a hole for ribbon. 

Then I just had fun layering different embellishments and papers to create 6 unique gift tags!


I just love these! They are easy to make and each one can look very different. They will look great on gifts!


Think about what you can do with the last tidbits of your kits and collections!


Wednesday, March 14, 2012

Designer Showcase: Wearing of the Green

St. Patrick's Day is coming up. Some say if you're not wearing green, you are to be pinched!  Well, we didn't want to be caught without wearing our green, so this week for the Designer Showcase you'll be seeing GREEN! 

Let's start off with some digital pages.  Dolores created this page just for this showcase!  I really like how she used St. Patrick's motif's to reflect on her relationship with her husband. "Lucky in Love", the perfect title! There is so much to like on this page, the subtle patterns in the background, the scattered bling and the beautiful clusters with a few shamrocks thrown in. I like how she has modified her photo to blend with the coloring of her page too.

I've also got a digital page to share.  Every year on the eve of St. Patrick's Day, our house gets invaded by a Leprechaun.  My boys try to build a trap to capture him, but we've never been lucky enough.  However, that clever lad leaves a trail of mayhem throughout the house. I captured a few photos of the destruction on this page. I went with a modified block design. The cluster of flowers in one corner and the journaling in the opposite corner bound the block.  I broke up all the green with a dash of blue, not to mention my son's bright red shirt.  Guess he's going to get pinched!

Heather has also designed a digital page. I love how she has used the word art strips to create a very meaningful title.  The patterns and shapes of the layered papers really add to the fun on her page.  The touches of purple highlight her daughters cute face!


Pam is sharing two traditional pages that she created. Pam is great at giving her pages dimension through shape. I love how in the top page, she has used a large circle with smaller squares, and in the bottom page she has used a large square with smaller circles. The plaid pattern and color combinations really give her pages a lot of spirit!

This page by Nancy is great. I love the masculine feel to it. All the details give it just enough grunge and edginess. Yet, there are touches of chic to give it a soft, happy feel too. The stars and argyle pattern work so well for a guy page. Check out the stitching on the sides and the big star! Nancy says she doesn't work with the color green much, but she has done an amazing job with the color combo on this page!

Vicky has this "sweet" page to share with us. The color combination of green and pink is so fresh, like Spring. The patterns in the papers she selected are such a perfect match to the dress and the chair in the photo. I really like how she has used the gem swirls to give that butterfly flight.


Now this page is wearing some green!! And it really shares the spirit of St. Patrick's Day!  Marlene has done a great job decorating this page. Look at the way she has used eyelets. She that gorgeous blingy trim going through them, and she has also used them as accents on the page. I like the way she used that trim again to highlight her fun title.

How perfect for St. Patrick's Day is this page by Marlene?  I love it!  The title has me laughing!!  Is it just me, or do you automatically take on an Irish accent when you say it out loud?  Try it!  I like how Marlene has pulled the colors from the striped paper into the flourishes about the page.  The ripped circle in the middle of the page is so creative. What a great way to give focus, texture and dimension to her page.

So, you see, there shall be no pinching here as we're all wearing our green! We hope you have a wonderful St. Patrick's Day!

Tuesday, March 13, 2012

Working with Mismatched Letters

I'm guessing that all of you have experienced the frustration of getting out the perfect alphabet stickers or chipboard letters, only to find that you're missing a crucial letter to spell your title.  It's so annoying!  Back in October, I shared six of my favorite solutions to the problem of a missing letter.  Today I'm going to share two more ideas:


Use Chalk:  Check out the letters in the title of my "First Bike" layout.  All but one of them are from the same sticker sheet (BasicGrey 'Cupcake').  Can you tell which letter is from a different set?


It's the T.  It's from BasicGrey 'Oh Baby Boy.'  It was a similar color, but definitely not close enough.  You can see it here:

I attached it to the 'Cupcake' sticker sheet, then used a q-tip and chalks to match the color of the T to the letters around it.  It took a bit of trial and error, but the final color was a perfect match!


Use Paint:  Check out the chipboard letters in my "Paint" layout.  They were all different colors and patterns that clashed with one another, my photos and my paper.  I painted the letters with a cream base coat, then used the back of the paintbrush to add dots of all different colors.  Now they not only go together, but they reinforce the theme of the layout.


I hope one of my eight suggestions helps you out the next time you're short one letter in your perfect title.


Swirlydoos March Blog Hop

The Swirlydoos March Kit Reveal Blog Hop Block Party starts today! This kit, named "French Quarter", features the gorgeous Glitz Design "French Kiss" collection combined with a wealth of incredible flowers, embellishments and specialty papers. Head over to the Swirlydoos blog (http://www.swirlydoos.blogspot.com) and start from there. They have some amazing projects for you to see from their design team and as a bonus... 2 manufacturer blogs that are joining in the fun (and a 3rd manufacturer offering a prize too!). There are a total of 4 prize great packs up for grabs so make sure to follow along and have fun!

BLOG HOP DETAILS: You have until midnight, eastern time, on March 15th to complete the hop. Winners will be announced on the Swirlydoos Blog on March 16th. In order to qualify to win here is what you need to do:

1: Visit ALL of the blogs and leave a comment on each and become a FOLLOWER if you're not already. Take your time. There are beautiful things to see along the way.


2: Before you leave each blog, look for the “special” WORD and write it down. Once you have visited all the blogs and collected all the special words, they will create a sentence.

3: Finally, go back to the Swirlydoos blog and leave a comment letting them know how much fun you had and tell them the SENTENCE that was created with all of the special words you collected.

You'll really want to go check out how each of the design team members used this lovely kit sketch - revealed on their blogs today!