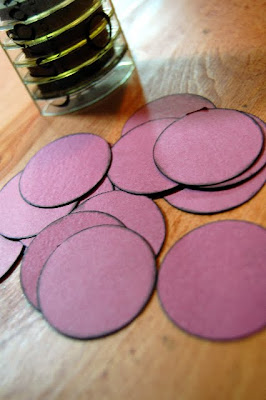
For a 12 inch border you will need to punch approximately 15, 1 1/2 inch circles.

Ink the edges of all the circles.

Cut a 12 inch strip of paper that you will adhere your finished circles to. I made mine 2 inches wide so you would see of the paper below the circles.

Take one circle at a time and bend bend two sides together until them meet in the middle but don't over lap and then push down to crease the fold. Repeat this will all of your circles.

Put a strip of adhesive on the back of on one of your folded circles and line it up with the left side of your 12inch paper strip and then add the next folded circle to the end of the first one and continue the process until the strip is full - you may have a bit of paper left at the end, I just trimmed it off.

When you have adhere all of your picture or paper to the top your strip of folded circles I recommend using a strip of double sided tape to be sure all of the folded circles are held down equally giving them a nice uniform look.

Here is the final product!!! I just love this border! I saw this type of border on a page and a fellow bloggers (http://whimsicaltwist.blogspot.com/ - check her out!) and just had to give it a try! It looks very complicated but its really easy to put together. You could even alternate the color of the circles to create a pattern or use reversible paper with different prints on each side for a different look.
Happy Scrappin -


Cool technique!
ReplyDeleteSuch a cool technique, will check out that blog!
ReplyDeleteThis is terrific. Thanks for the demo, I'm going to do this!
ReplyDeleteWhat a great use of a circle punch!
ReplyDeleteFabulous idea....I'm always looking for ideas to do in the car when we're traveling...this is one; thanks.
ReplyDeleteThis is so simple and cute. Gotta remember to use this! TFS!
ReplyDeleteThis is super cool! I'm totally going to have to try it! Thanks for sharing.
ReplyDeletethat for this, have linked to the site via my blog today, thanx
ReplyDeleteJo xxxx
So cute. Thaks for sharing!
ReplyDeleteawesome idea
ReplyDeleteI am happy you all enjoyed this!
ReplyDeleteSara
This comment has been removed by the author.
ReplyDeleteHi Sara! Thank you so much for mentioning my blog today. I'm so flattered! ::smile::
ReplyDeleteBoth your tutorial and layout are fantastic!
I love this technique for borders and have used it on several layouts. It adds so much dimension! This kind of border is also fun to layer with other borders as I did here: http://whimsicaltwist.blogspot.com/2010/06/citrus-tree-studio-sketch-challenge.html
Thanks again!
i tried this out today! love it... i'll link this post to my blog when i get it up there!
ReplyDeletethanks!
Hello I would like to receive your visit on my blog. I placed an advertisement on his blog with a Walkthrough done for you. http://scrapsmariza.blogspot.com/2011/01/tgis-blog-is-wonderful.html
ReplyDeleteCongratulations for your blog. I really liked everything I saw him. Hugs
Mariza
love this. great idea. Going to give it a try!
ReplyDelete